Use Copy Service to copy the
service information between dates of service for the same client. Find
this feature on the Services/Notes
page for the client. The Copy Service
![]() toolbar item lets you make a copy of the service
that is displayed, and then allows you to make changes to the service,
if needed. This is an efficient process if the majority of the existing
service details are the same for the copy of the service you make.
toolbar item lets you make a copy of the service
that is displayed, and then allows you to make changes to the service,
if needed. This is an efficient process if the majority of the existing
service details are the same for the copy of the service you make.
Display the client you want to work with.
a. To
display a client, click the Open this
Client drop down list ![]() .
.
b. Select the <Client Search> option.
The Client Search window is displayed. View field definitions.
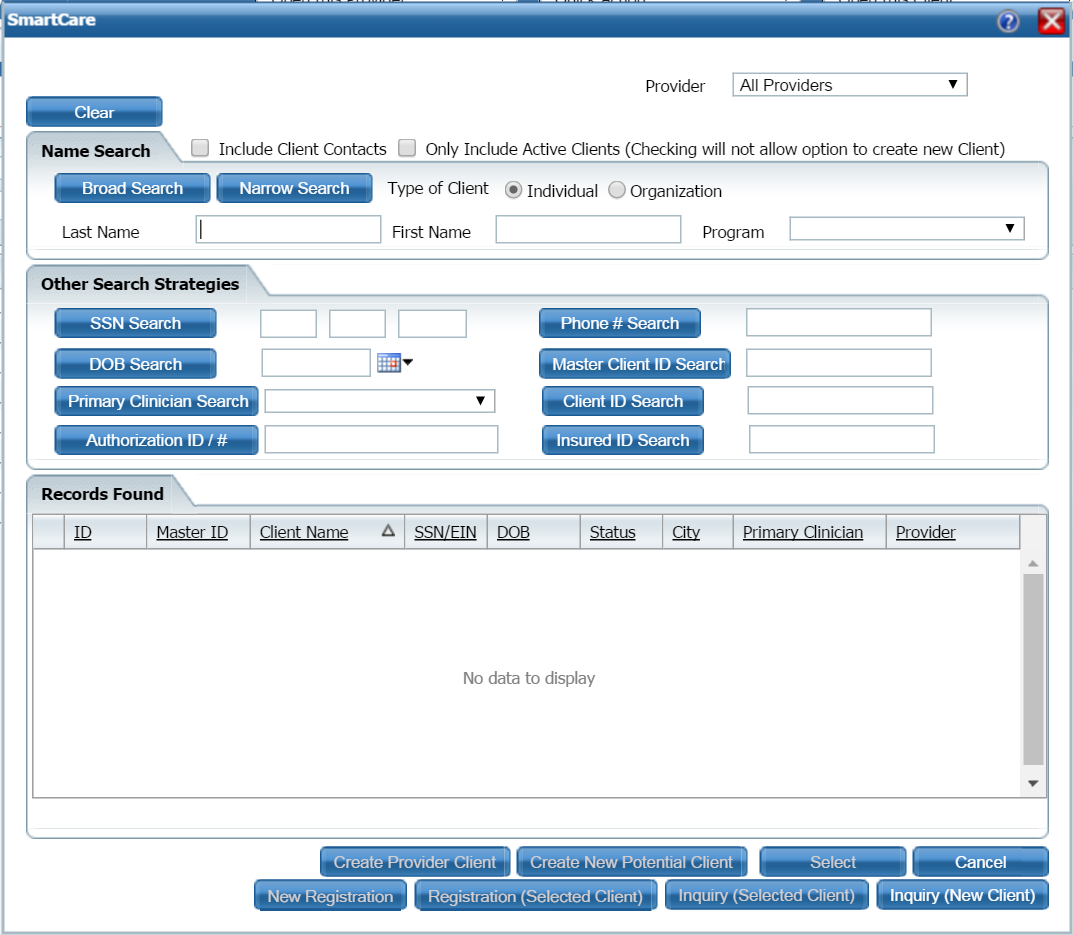
Search for the client you want. Tell me how...
When the client you want is displayed and selected, click the Select button.
The Client Summary page is displayed. View field definitions.
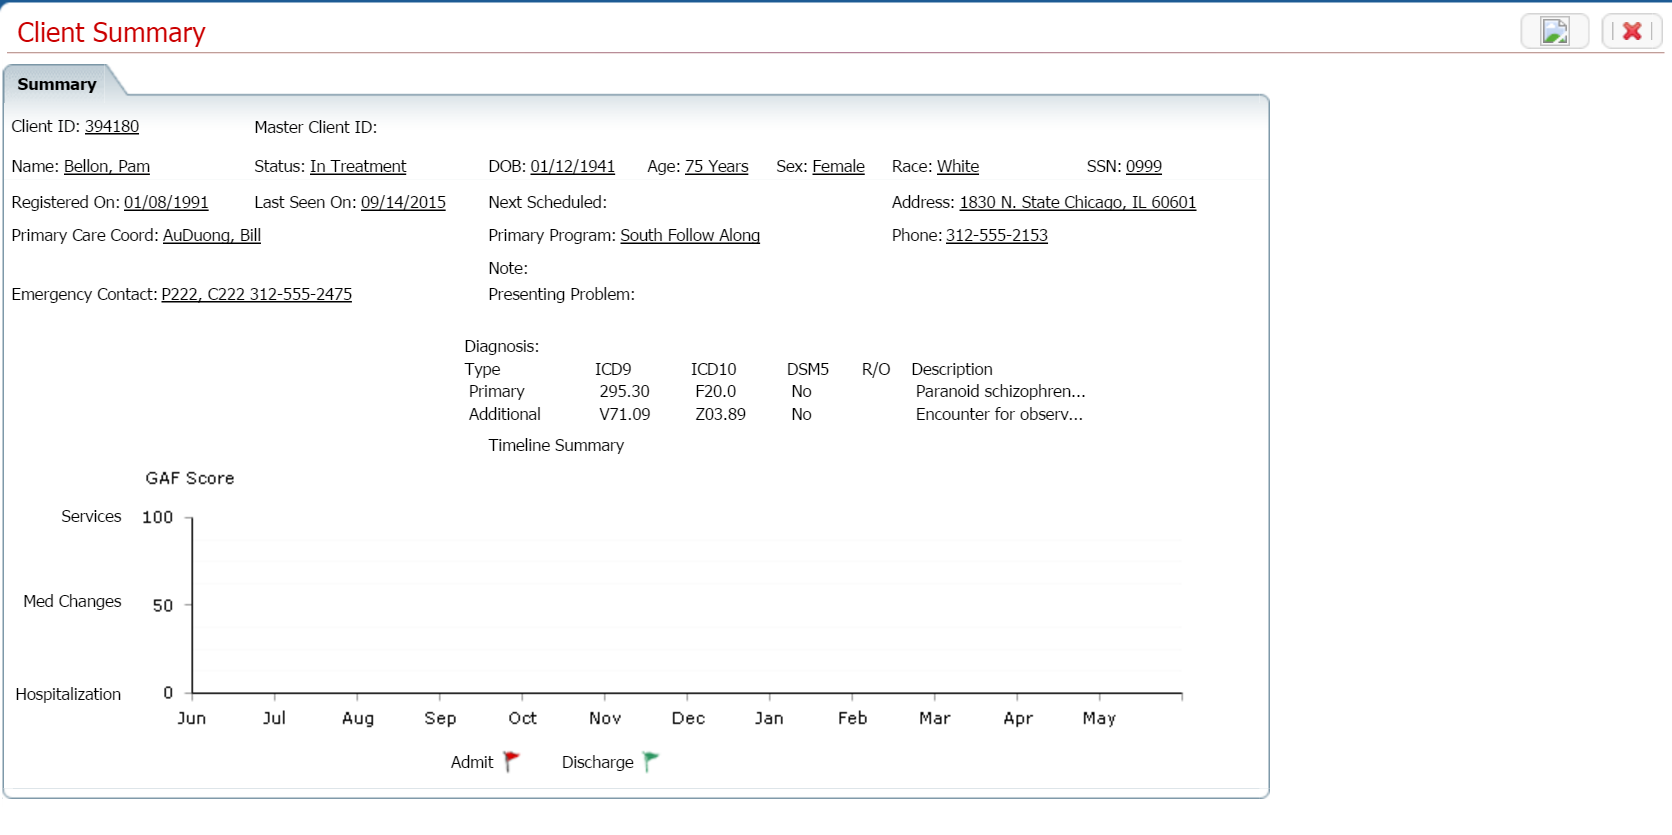
Notice that a Client tab is displayed to the right of the My Office tab. The tab displays the client's last name, first name and the client ID in parentheses.
![]()
Select Services/Notes from the Client banners.
The Services/Notes (###) list page is displayed. View field definitions.
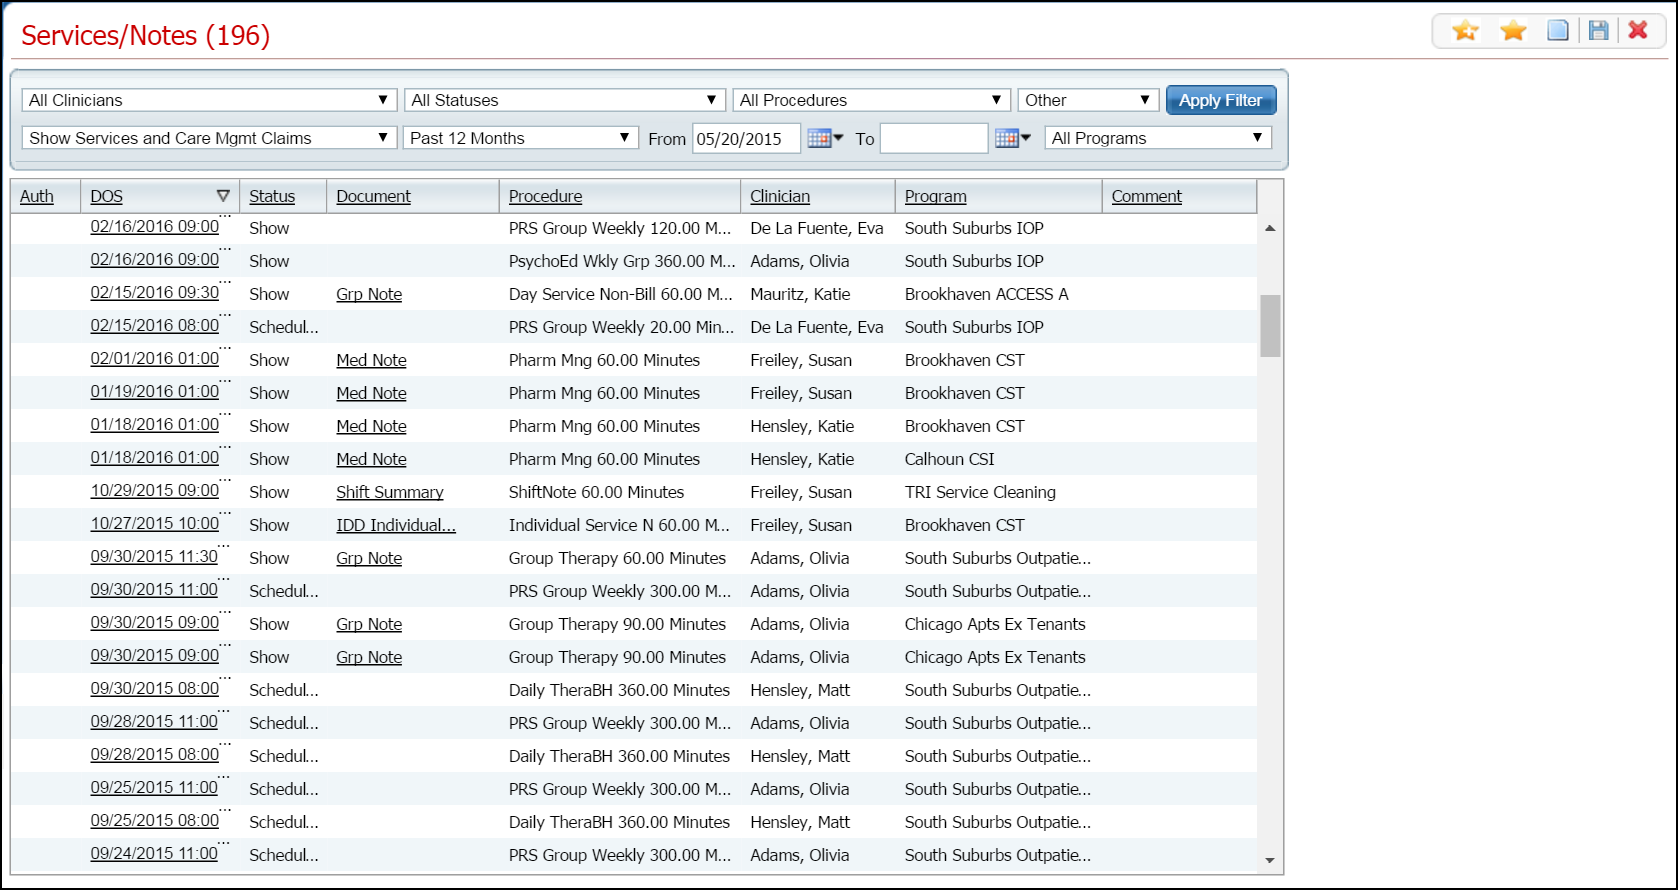
Filter the list to determine the records that are displayed. Tell me how...
To make a copy of an existing service, click on the date of service you want in the DOS column.
The Service Note page is displayed with the Service tab active. View field definitions.
Note: the name of the page differs depending on the type of service performed on the date of service that you selected.
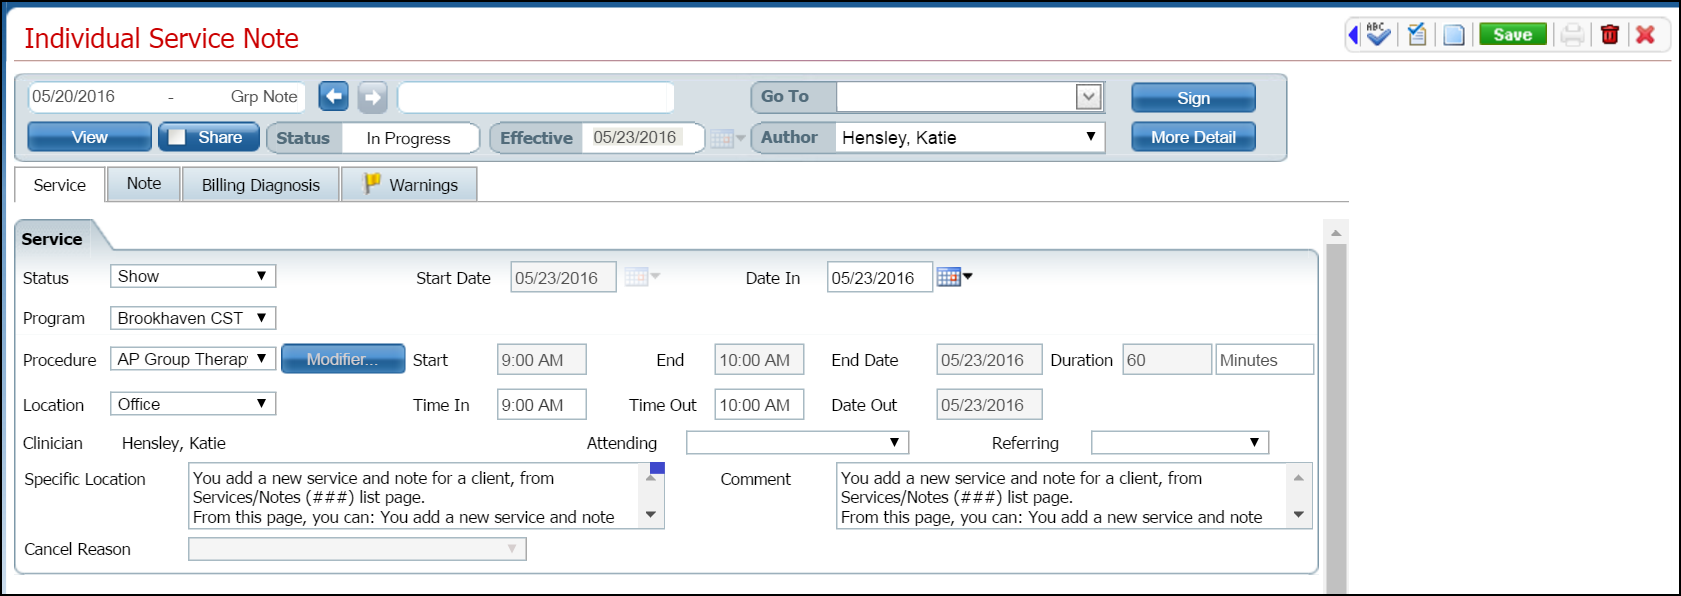
Verify this is the service you want to copy.
Click the Save button.
Click the left pointing blue arrow in the task bar to extend the display of icons. See the arrow outlined in red in the screen image below.
![]()
Click
the Copy Service ![]() icon in the task bar. See
the icon outlined in red in the screen image below.
icon in the task bar. See
the icon outlined in red in the screen image below.
![]()
A copy of the Service Note page is displayed. Notice that the date of service is changed to the current day's date and the status is changed to Scheduled.
Make changes on the Service tab for this new service, if needed. View field definitions.
Click the Save button.
Click on the Billing Diagnosis tab to make it active.
The Billing Diagnosis tab is displayed. View field definitions.

Make changes on the Billing Diagnosis tab for this service, if needed.
Click on the Save button.
When
you are done making changes, click the Exit
icon ![]() to return to the Services/Notes
list page.
to return to the Services/Notes
list page.